Altify Solutions are pre-configured templates that users can select and add as a solution on an insight map. For organizations with Altify Account Manager, they are also displayed in your account plans. For more information on solutions in account plans, see Plan Solutions.
Administrators can add multiple read-only sections to a solution that are displayed to the user when they open the solution on the insight map. Each section can include formatted text, hyperlinks and images, which the user can access when they open the solution on the insight map.
Example: An Altify Solution called 'Z-103/Z-360/Z-540 Software' is created. Two sections have been created for the solution: 'Tools' and 'Further Resources'. The Order determines the order in which the sections are displayed on the insight map.
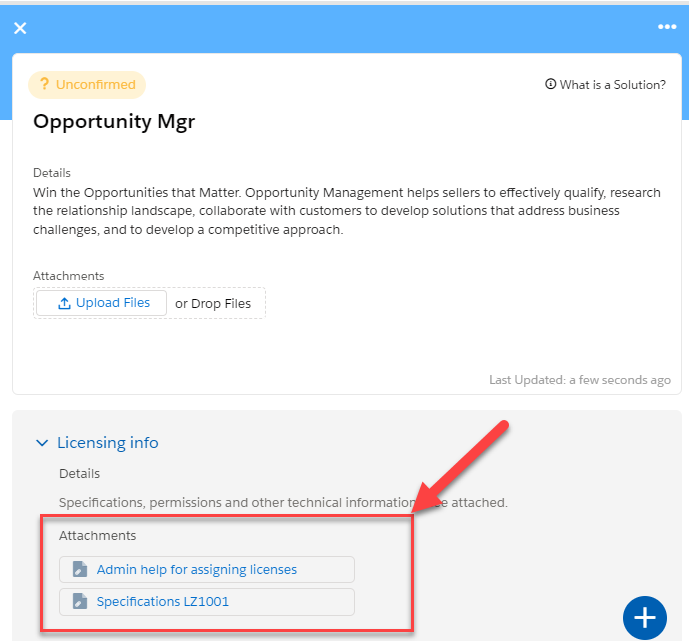
And below is how the above Altify Solution is displayed in the right-hand panel on an insight map:
Creating an Altify Solution
To create a new Altify Solution, do the following:
- Go to Altify Solutions in the App Launcher menu.
- Click the New button.
- Enter the Solution Name.
- Enter a Description - this information is also shown on the insight map (under Details).
- Click Save.
Adding a section
- On the relevant Altify Solution record, click the Related tab.
- Click New in the Altify Solution Sections pane.
- Configure the section as required. Here you can enter the label for the section (Altify Solution Section Name), the Order in which it is displayed, and the information that is displayed to the user (Details), including formatted text, images and hyperlinks if required.
- Click Save or Save & New if you want to create another section.
Adding attachments to a solution section
- On the relevant Altify Solution Section record, click the Related tab.
- Click Add Files in the Files pane.
-
In the Select Files dialog, select or upload the relevant files and click Add.
Solution section attachments are displayed as follows on the insight map:

